


Scissors
Ruler
Print out of your state map
Tiny brass nails
Wood platform
Crochet Yarn in your color choice
Mod Podge or glue and a brush (not shown)
I purchased the tiny nails and "wood slice" at Hobby Lobby. You can choose any type of nails but don't make them too long. The nails should also have a nice, flat head on the top to keep the string in place. If you want to do this with a canvas background, you'll have to lay a piece of wood behind the canvas, secure it, and then hammer the nails through the canvas and into the wood behind the canvas. I went with the "wood slice" platform for a more rustic feel. You'll notice two hammers. I wasn't sure which one I was going to use but found, once I started, the smaller, jeweler's hammer worked best for the tiny nails.

What You'll Do
Scour the Internet and print out an outline image of your state. The print out should be appropriately sized for your wood platform size.
 |
| Use your ruler to size it out and cut out a little outside the outline. |
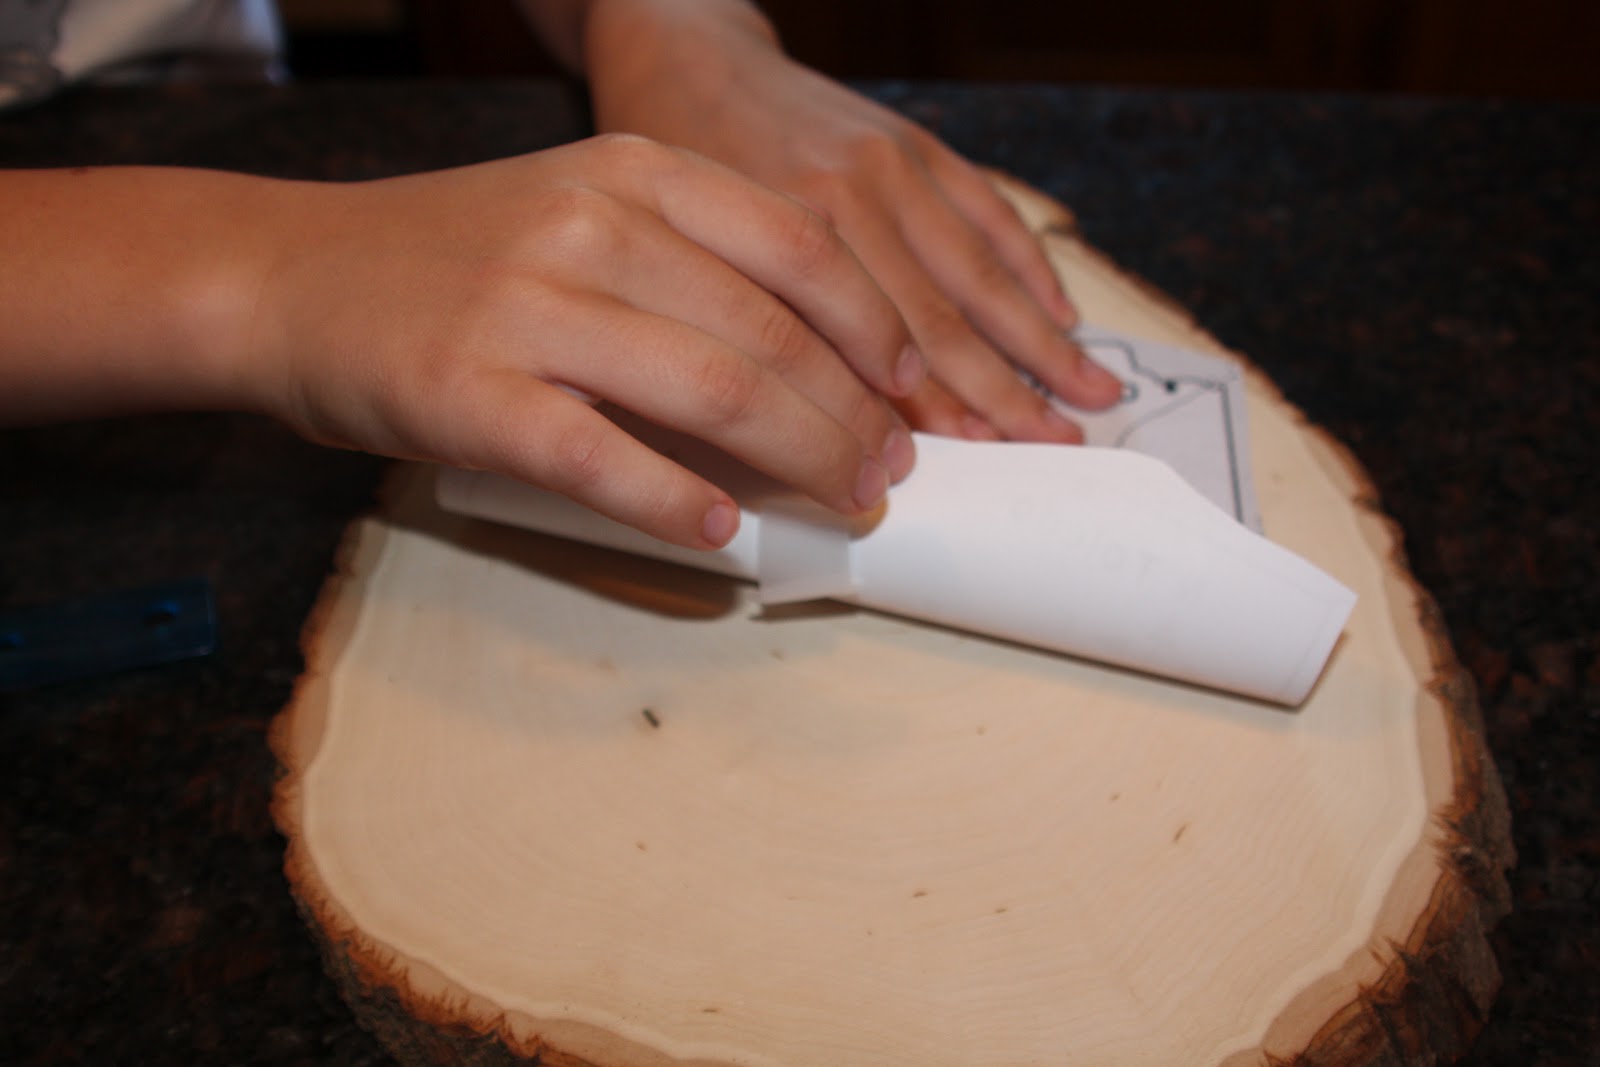 |
| Tape down your cut out state onto your wood platform. |
 | |
| Draw in a heart in the area where you live in your state. Hammer in each nail along the outline. Tear the print out to remove it from the hammered outline. |

Begin by knotting the end of the crochet yarn to one nail. Then, give yourself enough slack from the yarn and wrap away. Take the string across and around one nail, then change direction to another side, wrapping the string around each nail as you go. Avoid the area inside the heart, as that will be strung using a different color.

When each nail is wrapped with string at least once and you're satisfied with your string art design, cut the yarn giving enough length to tie another knot securing the string art remains taut and in place. For added security, I added a drop of Mod Podge to the end of the string on both ends, almost gluing the string to itself. It also helped to hide the extra little string from the end of the knot.
 |
| Repeat the same steps for the heart string art. You can see the Mod Podge in this photo. |
I didn't attach any hanging hardware to the platform because my intention was for the finished piece to lean against the back of a display hutch. If this is also your intention and you go with the "wood slice", be sure to select one that will stand up straight when leaning against a backdrop. You'll notice the "wood slice" I chose had a flat, straight bottom.

If you were to do this project, what state would you represent?


20 comments:
So cute - very American. I linked in a pizza made with roast chicken leftovers to Live.Laugh. Rowe's linky party. Have a great week.
Cute! I may have to make one for our new house!! Stopping by from Carolyn's blog :)
oh my gosh..how cool is this! You should win some kind of prize !
This is so cool! We were just in Cleveland the other day! Visiting from Live Laugh Rowe!
Allison
I absolutely love this!
This is AWESOME!! So many possibilities with this time of creation. LOVE IT!
Thanks so much for sharing this at The DIY Dreamer.. From Dream To Reality!
This is sooo clever!!! Love how it turned out!! Thank you for sharing at Uncommon! Featuring this on our FB page tonight! ;) Bonnie
Thanks so much for sharing! I’ll be featuring your project Tuesday morning on Someday Crafts. Please stop back in and grab a Featured at Someday Crafts button for your blog. Thanks for the inspiration!
What an incredible idea! Really cute and fun. ;)
Carolyn
http://sillyhappysweet.blogspot.com
Oh this is so cute! I love the yarn and the wood platform you used!! I am super excited to follow you! I am going to pour over your blog now! Come follow back and we can be friends!
-Emily @ House + Hone
OMG, this is so cute! I love the yard you used and marking your spot with red! Very nice, will you be making any for IL? So glad you shared your creative inspiration with Sunday’s Best – your creativity helped make the party a success!
This a great idea! thx for sharing :-)
Lilly, this is amazing! What a cool idea! Thanks for sharing at Homemaker in Heels last weekend! You were featured this morning! :) Have a great weekend!
~Crystal
This is such a cute idea, Lilly! I love it!
Thank you so much for sharing at {nifty thrifty sunday}!
You will be featured at this week's party!
xo! Vanessa
OMG, sweet Crystal from Homemaker in Heels featured this project. Thank you, thank you!!!! Here's the link:
http://www.homemakerinheels.com/2012/08/weekend-craft-soiree-54.html
This is amazing i would love it if you could come share it at my link party at
http://www.twiggstudios.com/2012/08/sunday-show-off-linky-party.html?m=0
thankyou xxxx
Such a cool idea, thanks for sharing!! I am definitely putting this project on my to-do list :)
I featured you on my blog today, feel free to come check it out:
http://www.artsyfartsymama.com/2012/08/pinteresting-features-n-shtuff-43.html
SO cute!!
Love this! Move that
heart down a bit for me will ya lol.
I like your string art too! Especially the heart :)
Post a Comment