


Like last year's decade celebration with a Harry Potter theme, this year's party break down will be issued in several installments because this post would read like a book otherwise. It won't have as many "chapters" as the Harry Potter theme (last year's party was insanely awesome), but it will be incredibly interesting to follow nonetheless, if you choose to come along on this little journey to "there and back again".

There are so many various races in Tolkien's classic, The Lord of the Rings, like the elves, the hobbits, the dwarves, etc. We decided to make all our guests elves and, in so doing, relating the invitation to an elvish character.
The Invitations
- "Lembas. Elvish waybread. One small bite is enough to fill the stomach of a grown man."
- —Legolas Greenleaf on Lembas.

Lembas Bread
The idea behind the Lembas bread is to send it to each "elf", wrapped in a Mallorn leaf, with an invitation to an adventure, The Great Journey. How do you make a bread depicted in literature that no one alive has actually made, smelled, or tasted? You rely on the author's descriptions and try your hand at doing the best you can with it. But, I also had a little help from this website, to which I should give proper credit.
Follow the Lembas Bread recipe at this website and you're good to go! (The lemon extract makes ALL the difference so use it.)
Mallorn Leaf and Note

Once the Lembas bread is made, it will be delivered, wrapped in a Mallorn Leaf and tied with raffia or twine. During this project I learned something new that has changed my crafting world forever! You know that foam sheet you can get at any craft store on the planet? Well, if you apply a little heat to it, it's like putty in your hands! You can shape it and bend it any which way you like without melting it and when it cools, it stays the way you shaped it. Don't believe me? Check out my Mallorn Leaf instructions...

Printout of leaf template, found here
Green foam sheet (I purchased the large one so I could get 2 leaves out of it)
Black ballpoint pen
X-acto knife or scissors
Heat source (like an electric stove)
Raffia or twine to tie the leaf together with the invitation
Lembas bread
What You'll Do
 |
| Cut out foam leaf using template as your guide. |
Using a black, ballpoint pen add the veins of the leaf as indicated on the template.
 |
| Draw the veins using a black ballpoint pen. |

 |
| The pointy part will tuck in once the bread is inside. |
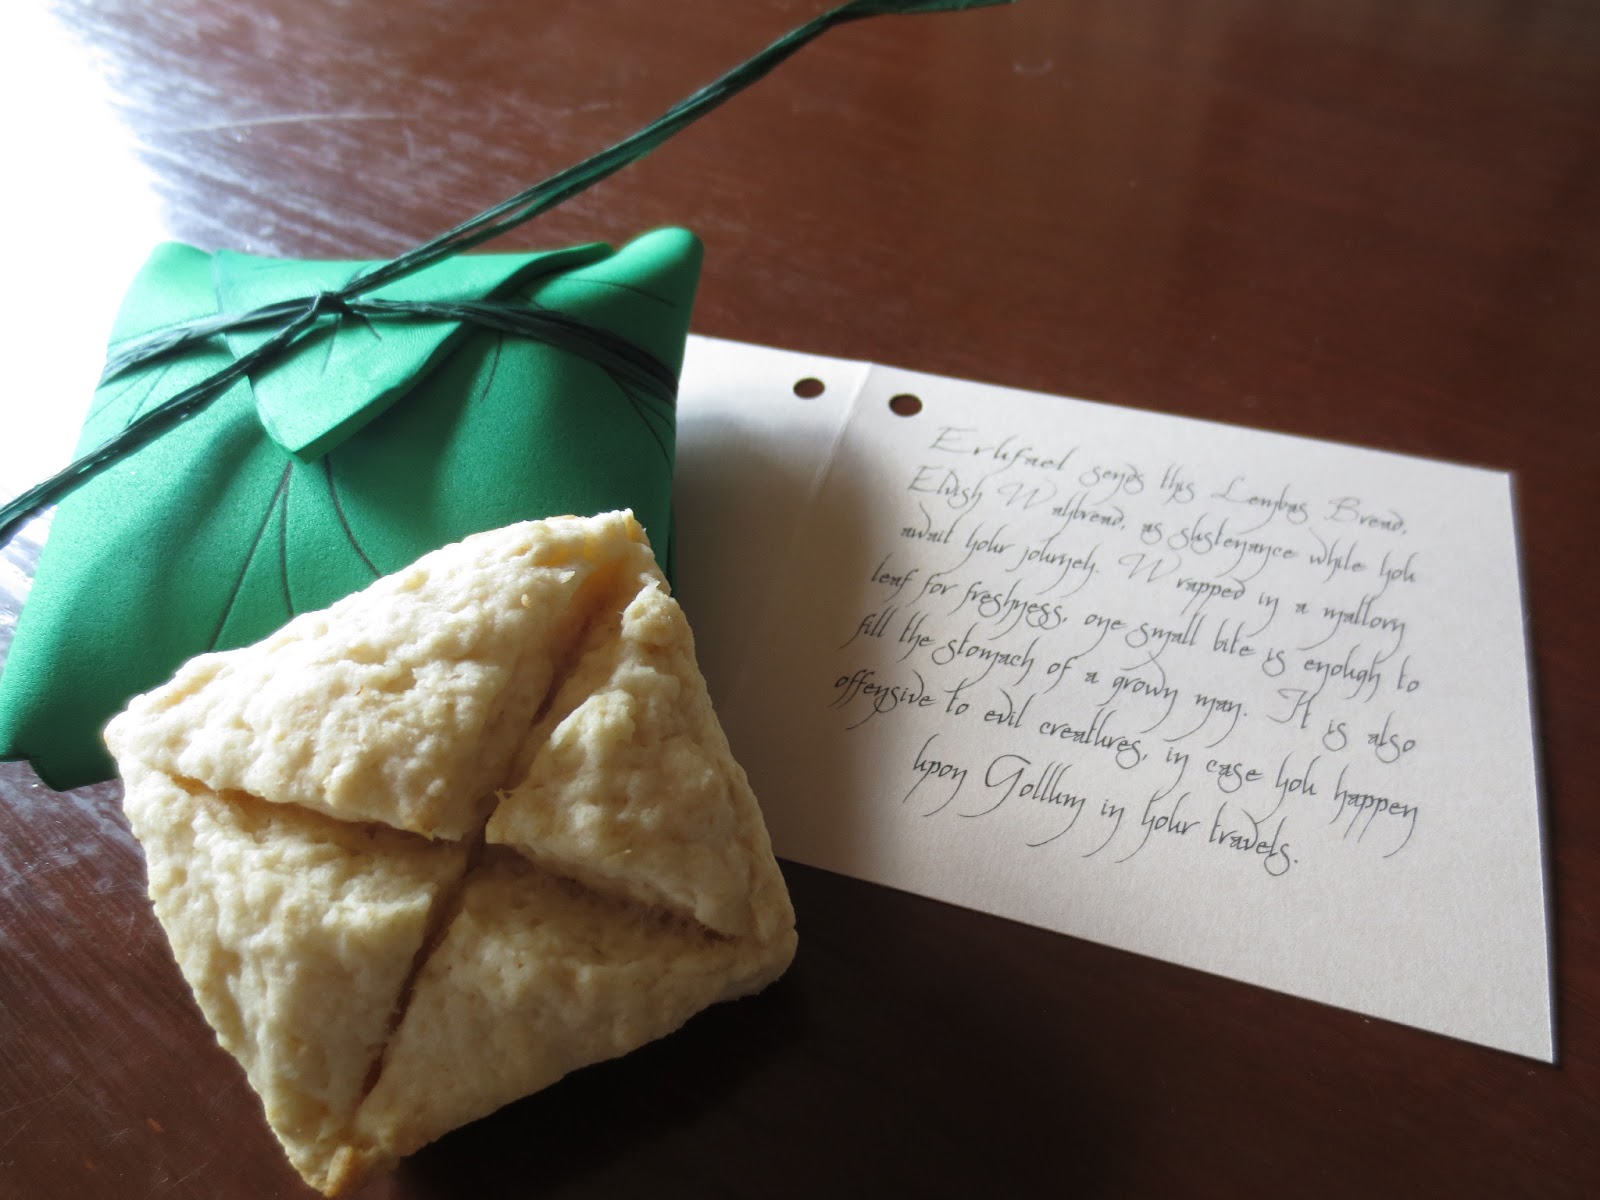
For sanitary purposes, I wrapped each Lembas bread in wax paper. I opened up the Mallorn leaf, placed the Lembas bread in the center, and folded the leaf around the bread like so (see picture). Be sure to tuck the point of the leaf into itself.
Take a looonng piece of raffia and securely tie the leaf in place, leaving enough slack to attach the rolled up invitation (details follow).


Erufael sends this Lembas Bread, Elvish Waybread, as sustenance while you await your journey. Wrapped in a mallorn leaf for freshness, "one small bite is enough to fill the stomach of a grown man." It is also offensive to evil creatures, in case you happen upon Gollum in your travels.
The Invitation
 |
| Map of Gondolin on back of invite |

The other side of the parchment read the actual invitation in that really cool font.
Long ago in the First Age
past the Grey Havens
and far over the Blue Mountains
was once a great city of elves.
Though hidden from the world
its secret was betrayed
and the city fell.
A gateway to the past has been opened.
A traveler from another time has entered the Third Age.
Erufael has summoned you, an elf of strong character
to travel with him back to his homeland.
If you desire adventure, come to the Prancing Pony
at xxxx The Shire
in the village of xxxxx
on Saturday, the Eighteenth of May at Five in the evening
for a Tolkien inspired Minecraft expedition
Celebrating Kiddo's Elevenses birthday
RSVP to Lilly
Bring this map, and beware green, creepy men


3 comments:
So creative!! Love this & Pinning! Found you through Living on Love and Cents! <3 Heidi Rew from Parties for Pennies
Wow, that's pretty!!! Thank you for linking it up at http://www.finecraftguild.com/gratitude-party-70/ ~ Rose
I was looking to see the website you used to covert names into elvish... Am I over looking it?
Post a Comment